Create and Manage Mock API Responses
With mockforme, you can create up to 10 different responses for each API endpoint. This flexibility enables you to simulate various use cases, test different scenarios, and evaluate your API's behavior effectively across a range of conditions.
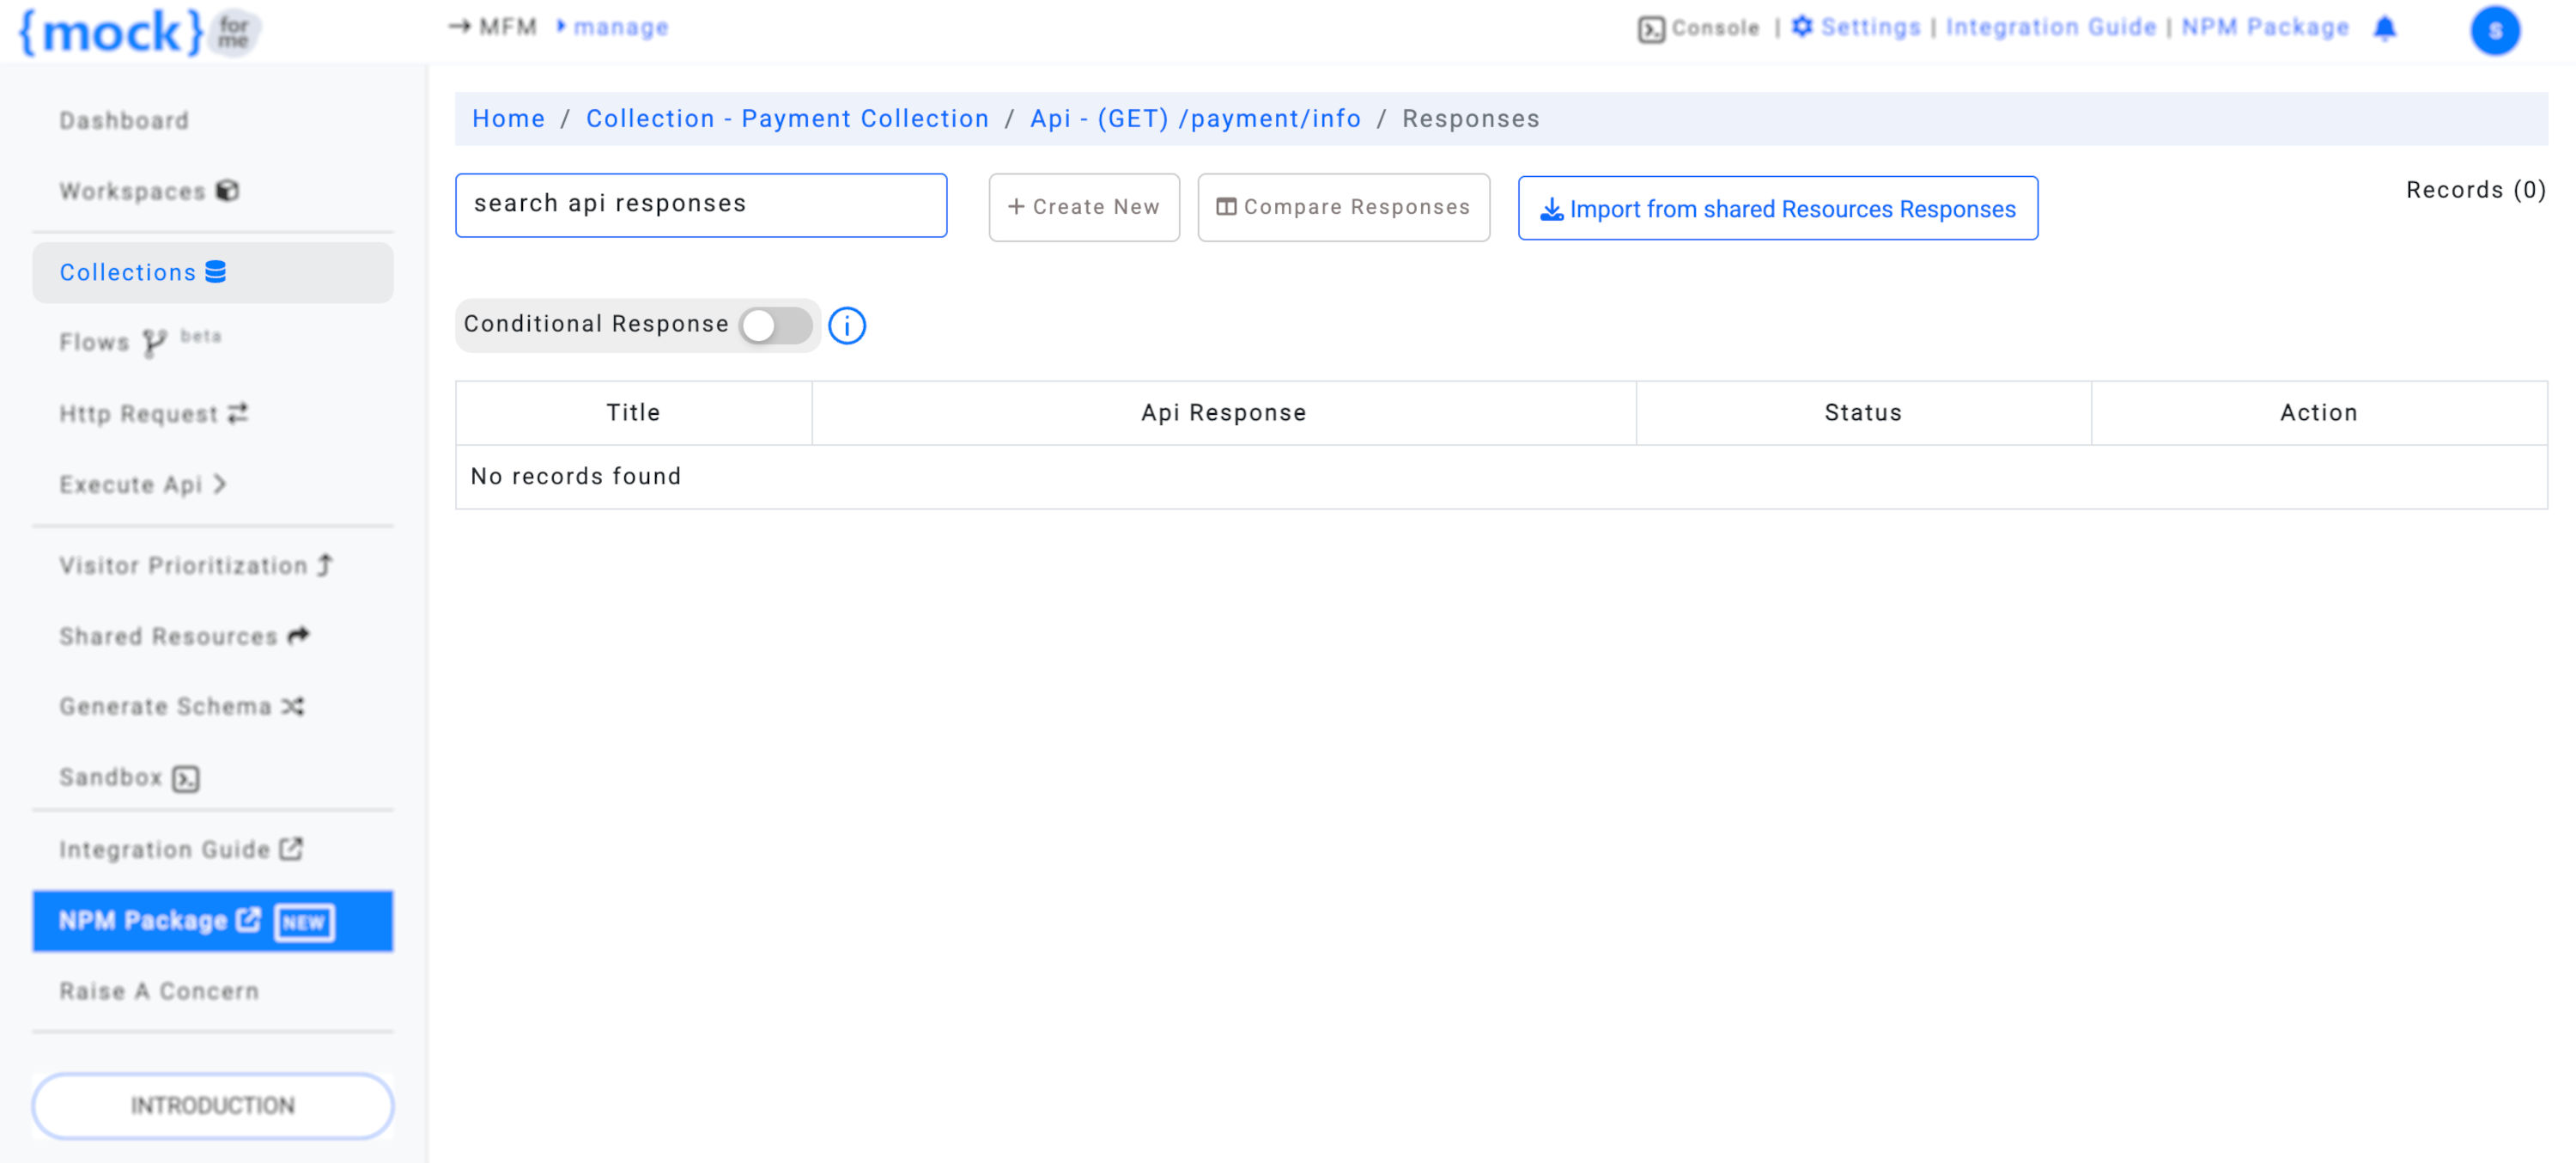
Accessing the API Response Page
Follow these steps to access the API Responses page:
- Click on Collections in the left sidebar.
- On the Collections page, click the Apis button.
- On the Apis page, click the Responses button.
- You will be directed to the API Responses page, where you can create and manage your responses.
Accessing the API Response List
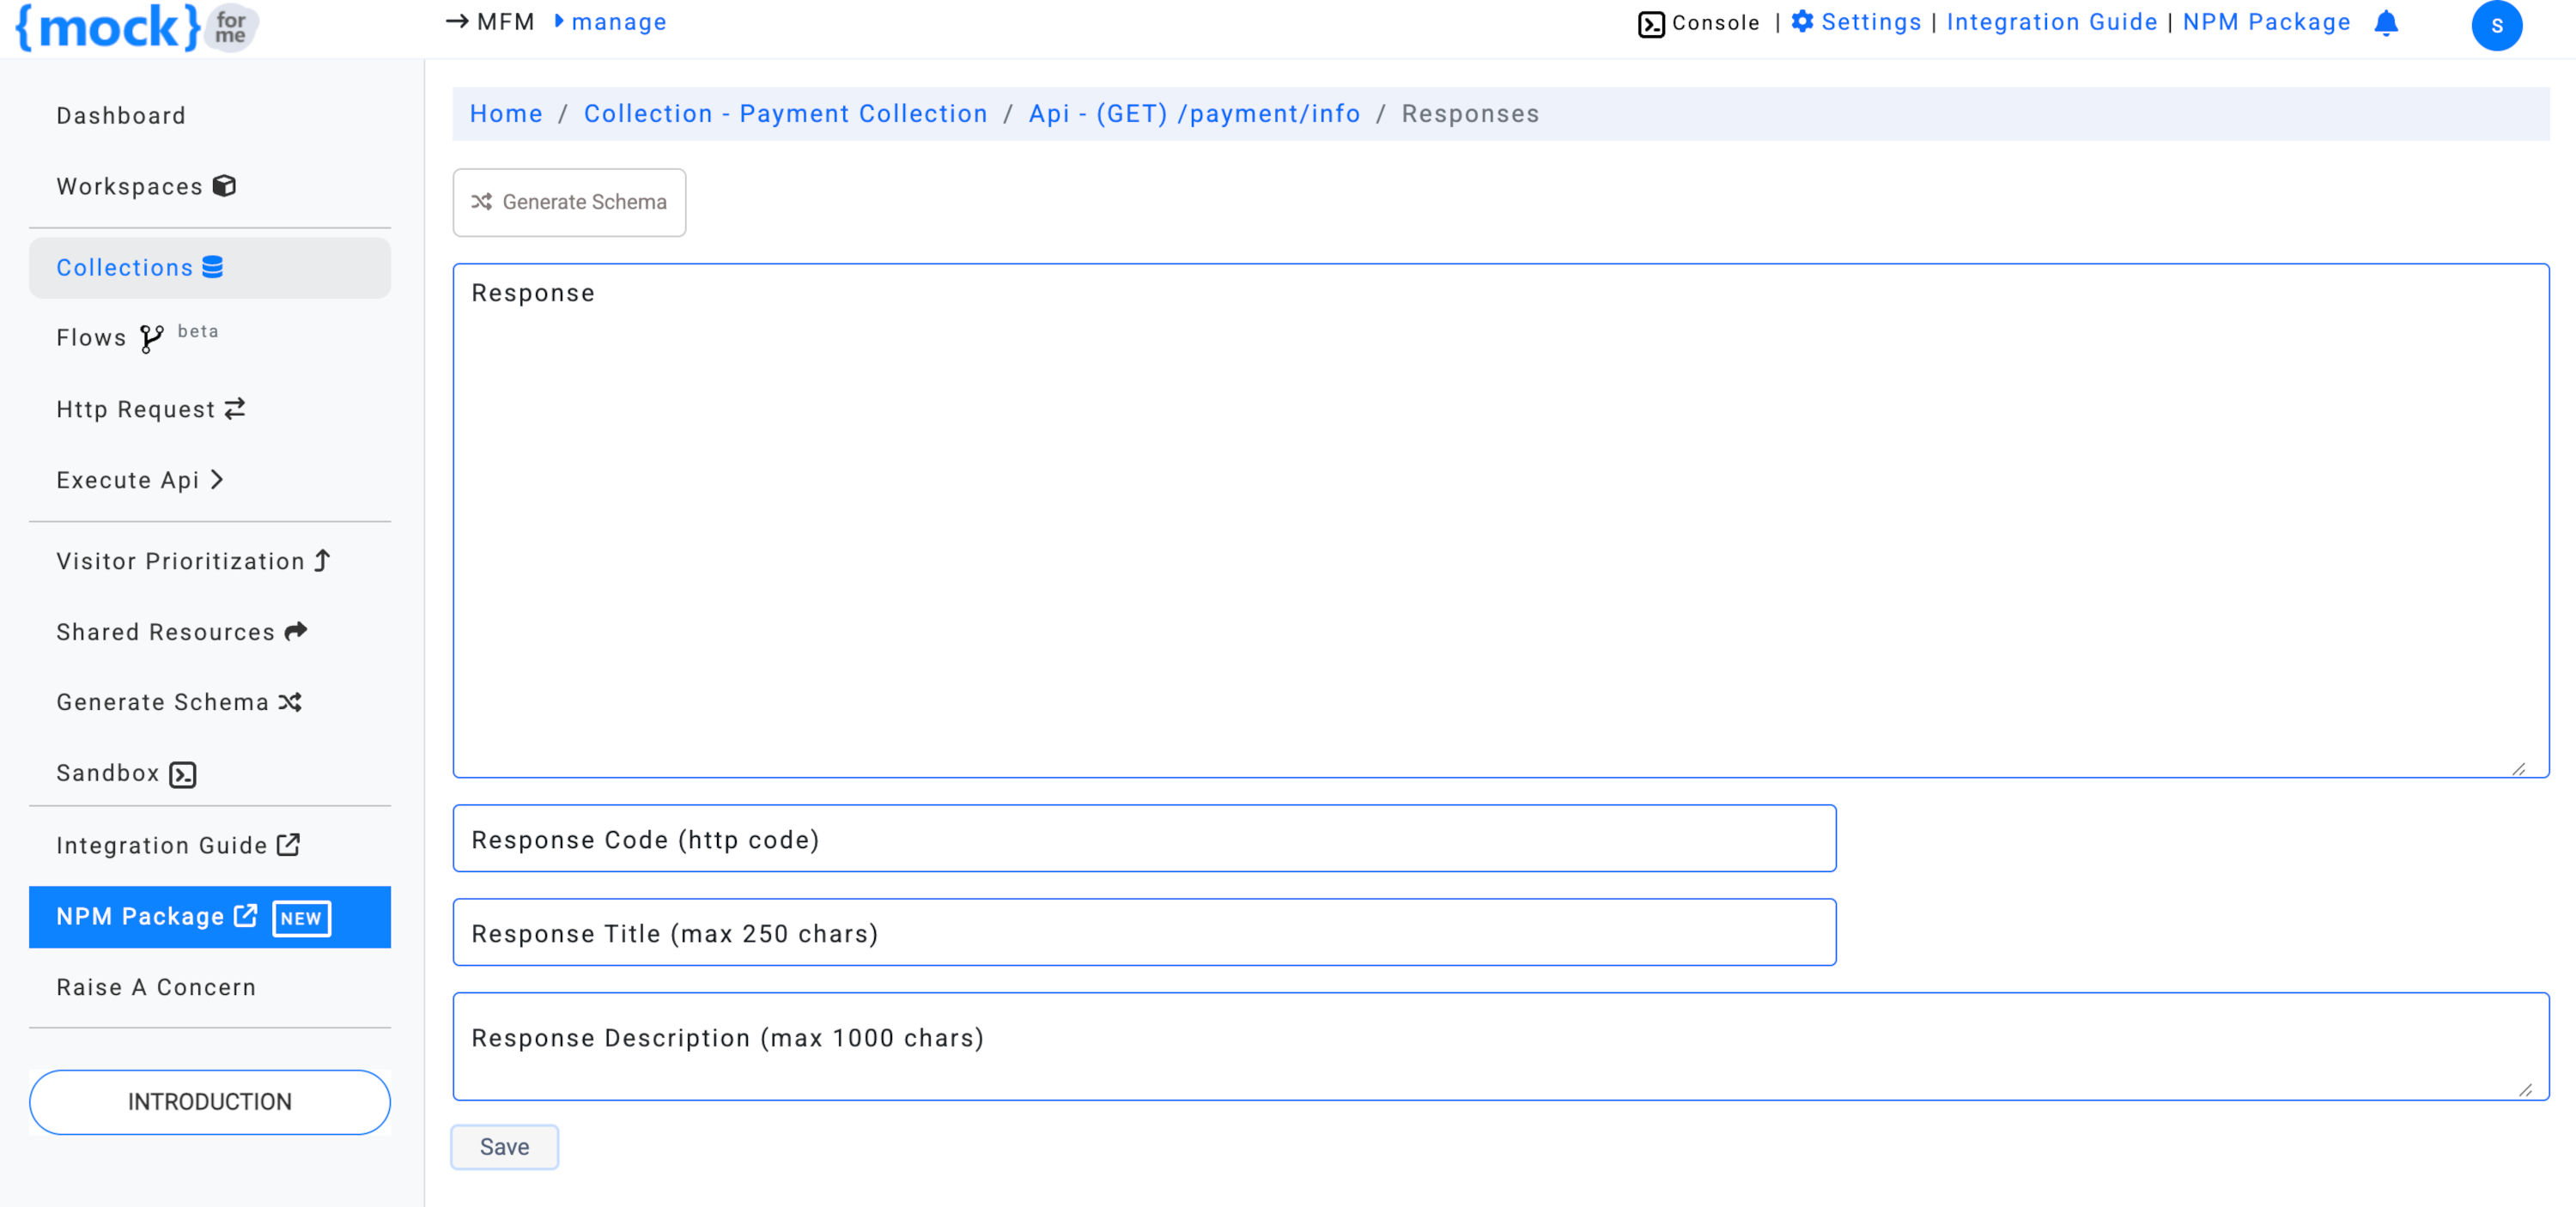
Once you're on the API Responses page, click the Create New button to begin creating a new response.
Creating a New API Response
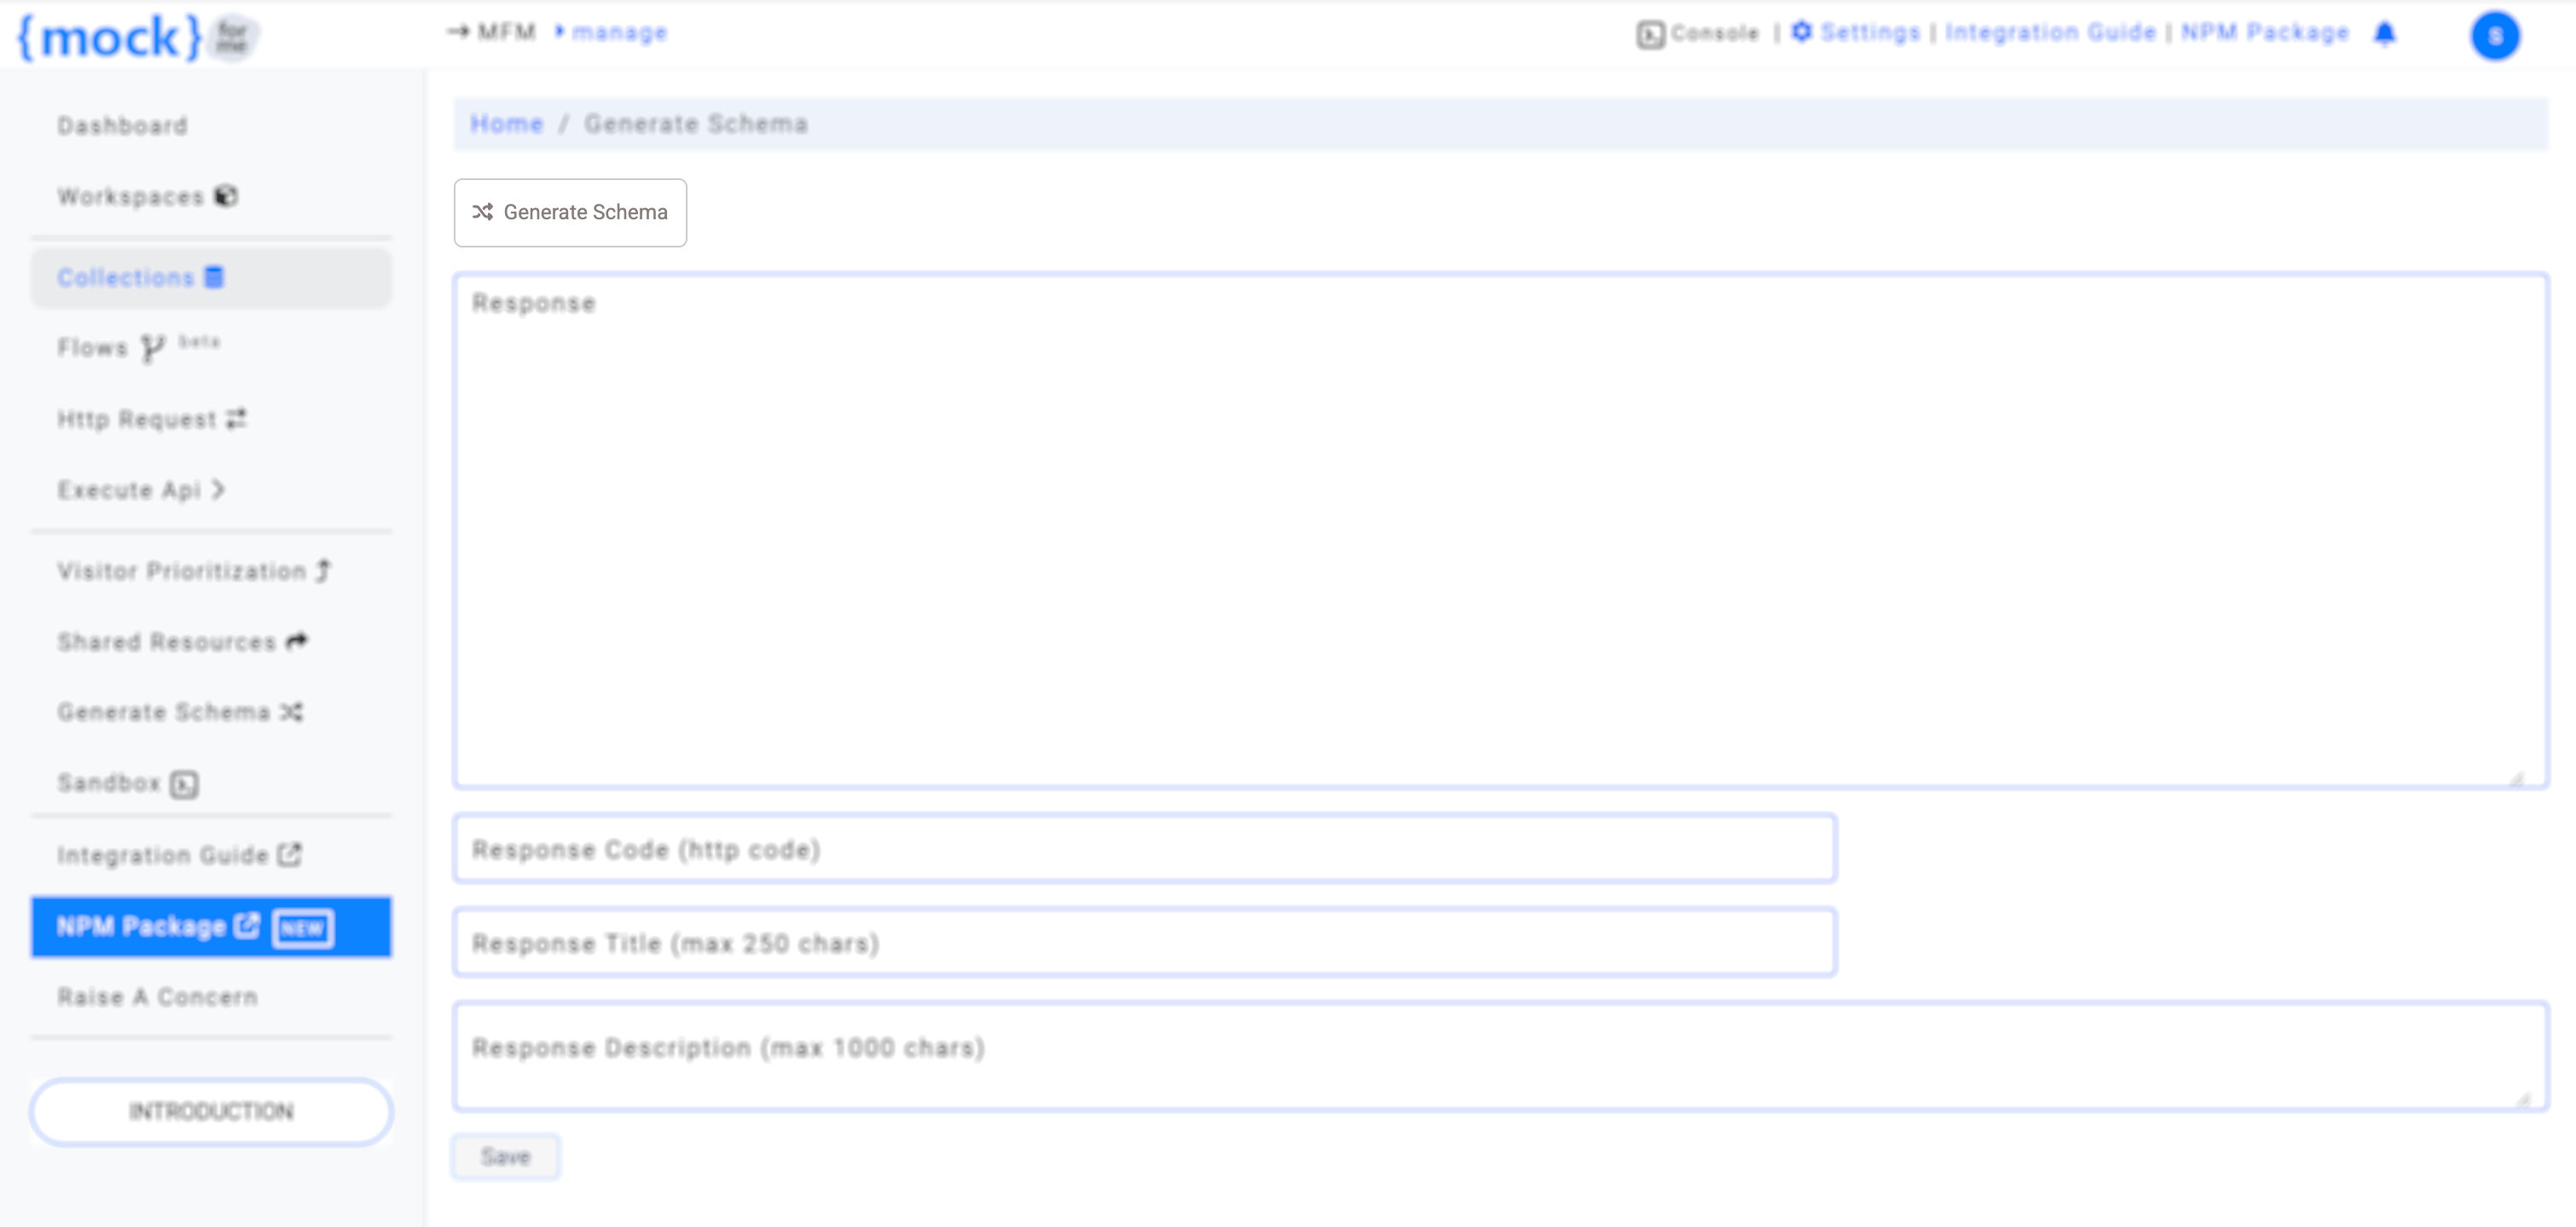
To create an API response, you will need to provide the following information:
- Response Body: The mock API response, which can be Text or JSON.
- Response Code: The HTTP status code to return (e.g., 200 for a successful response).
- Response Title: A descriptive label for the API response.
- Response Description: A detailed explanation of the API response and its purpose.
Add Response Using JSON Editor
If you're creating a JSON response, you can take advantage of the JSON Editor for easier editing. Once you've entered a valid JSON object, you will see the View in JSON Editor link. Clicking this will open the JSON editor for more advanced modifications.
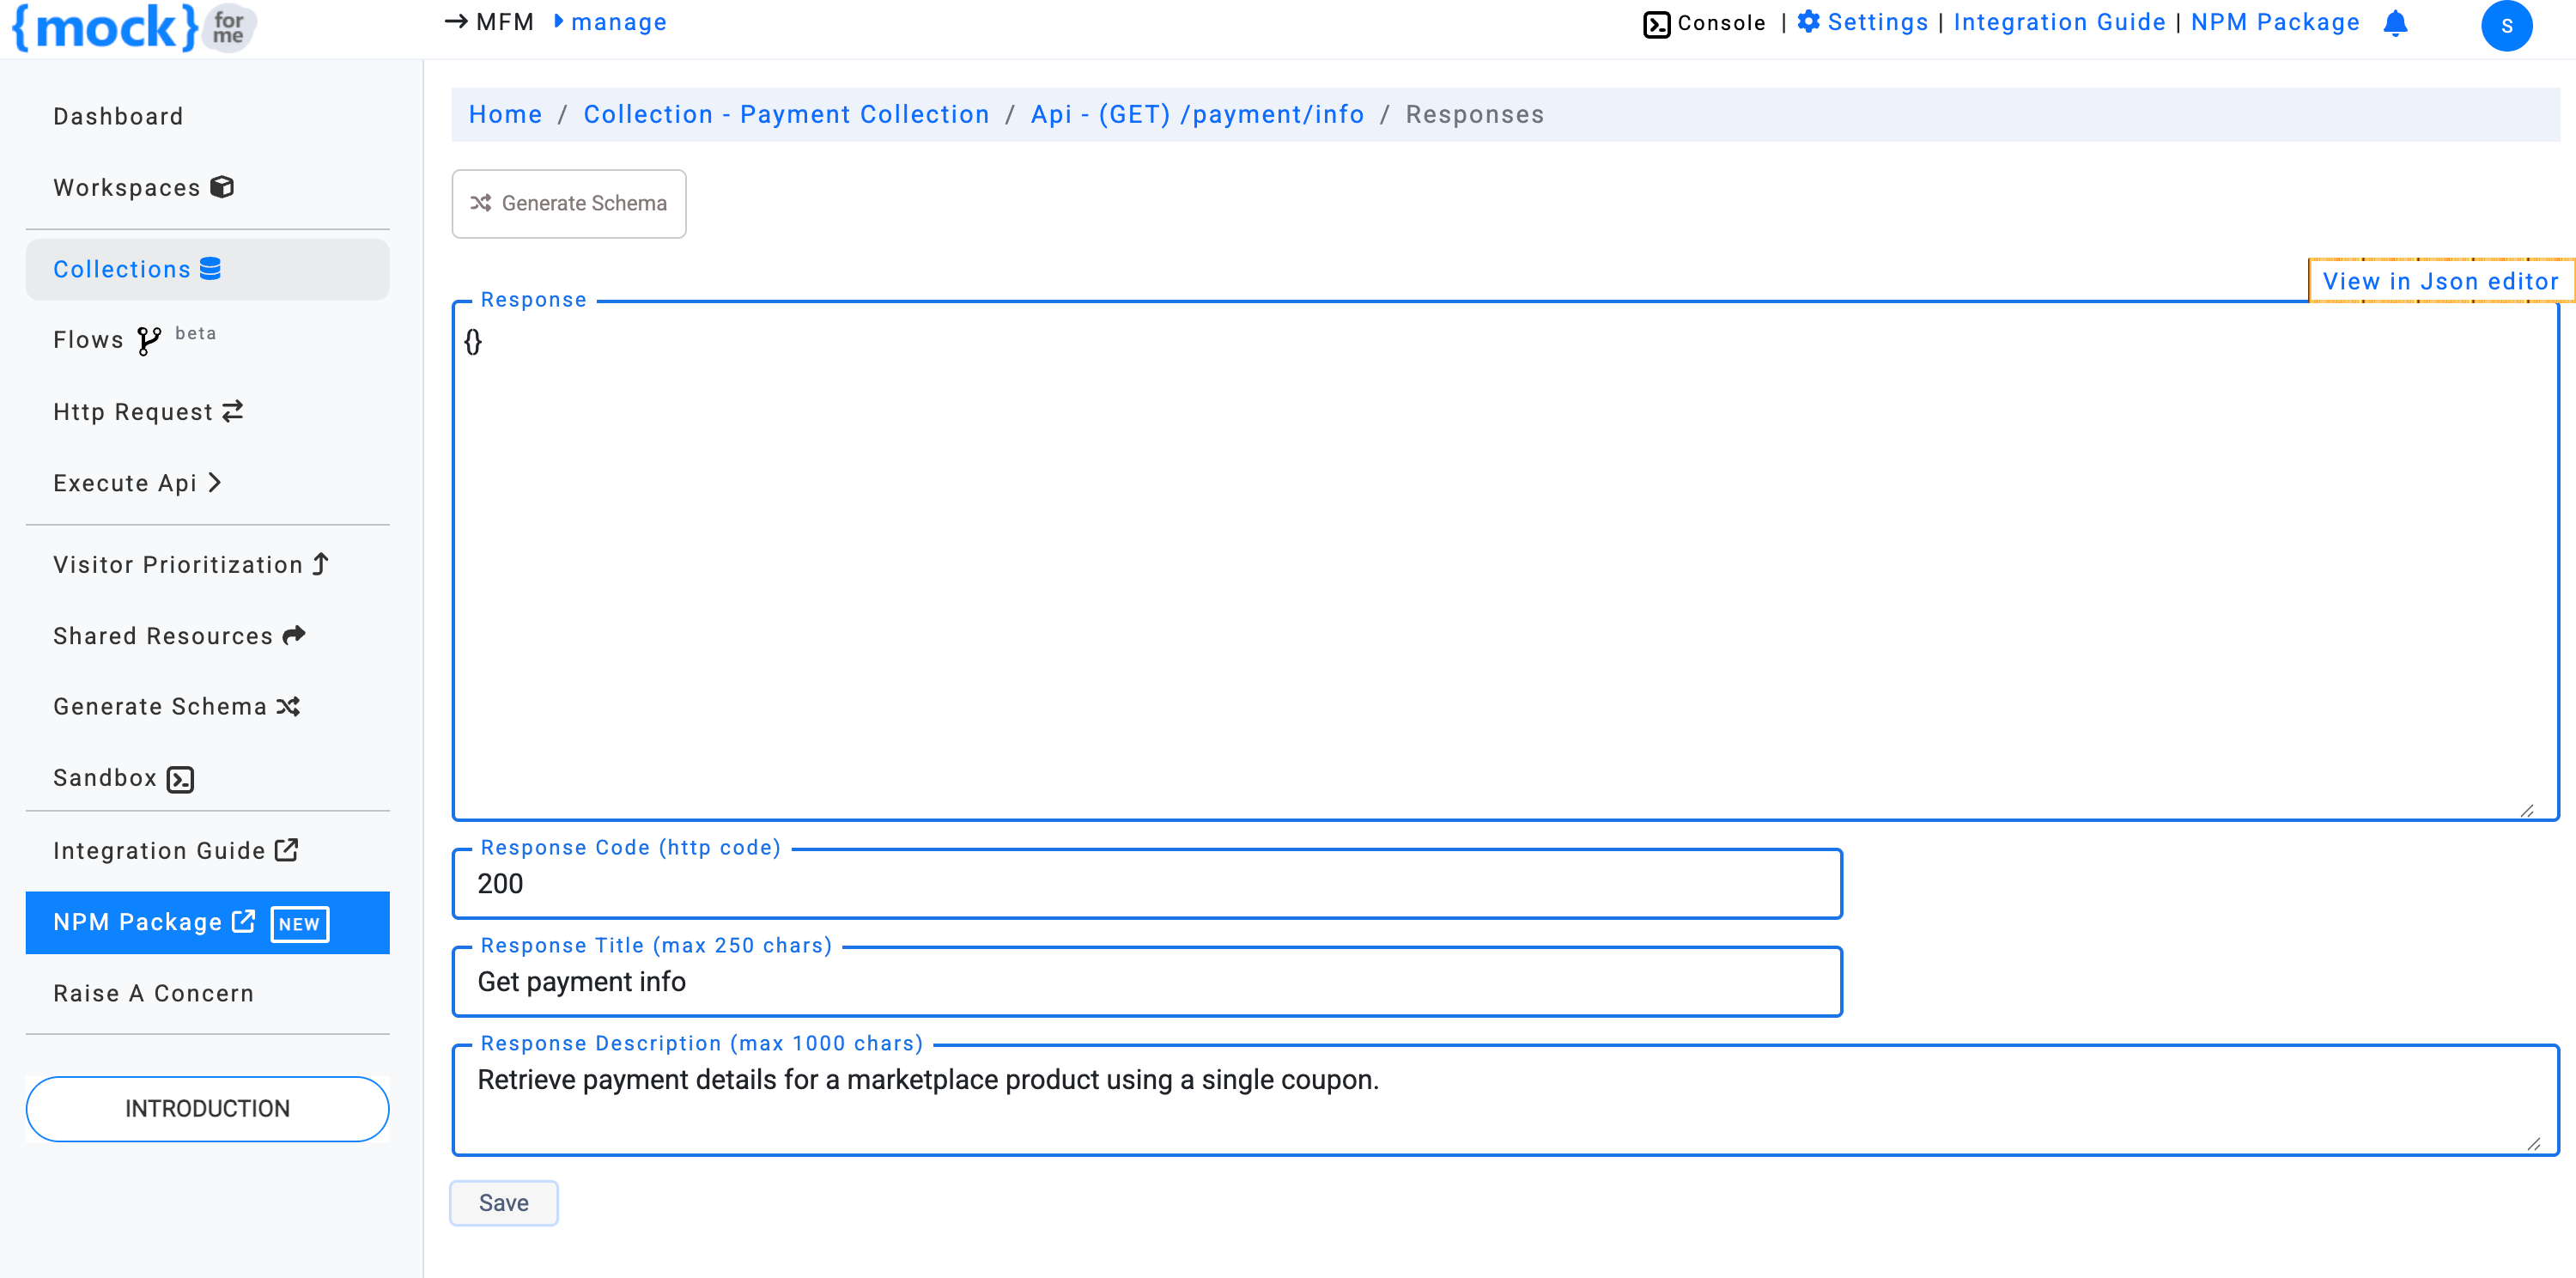
Clicking the link will display the editor as shown below:
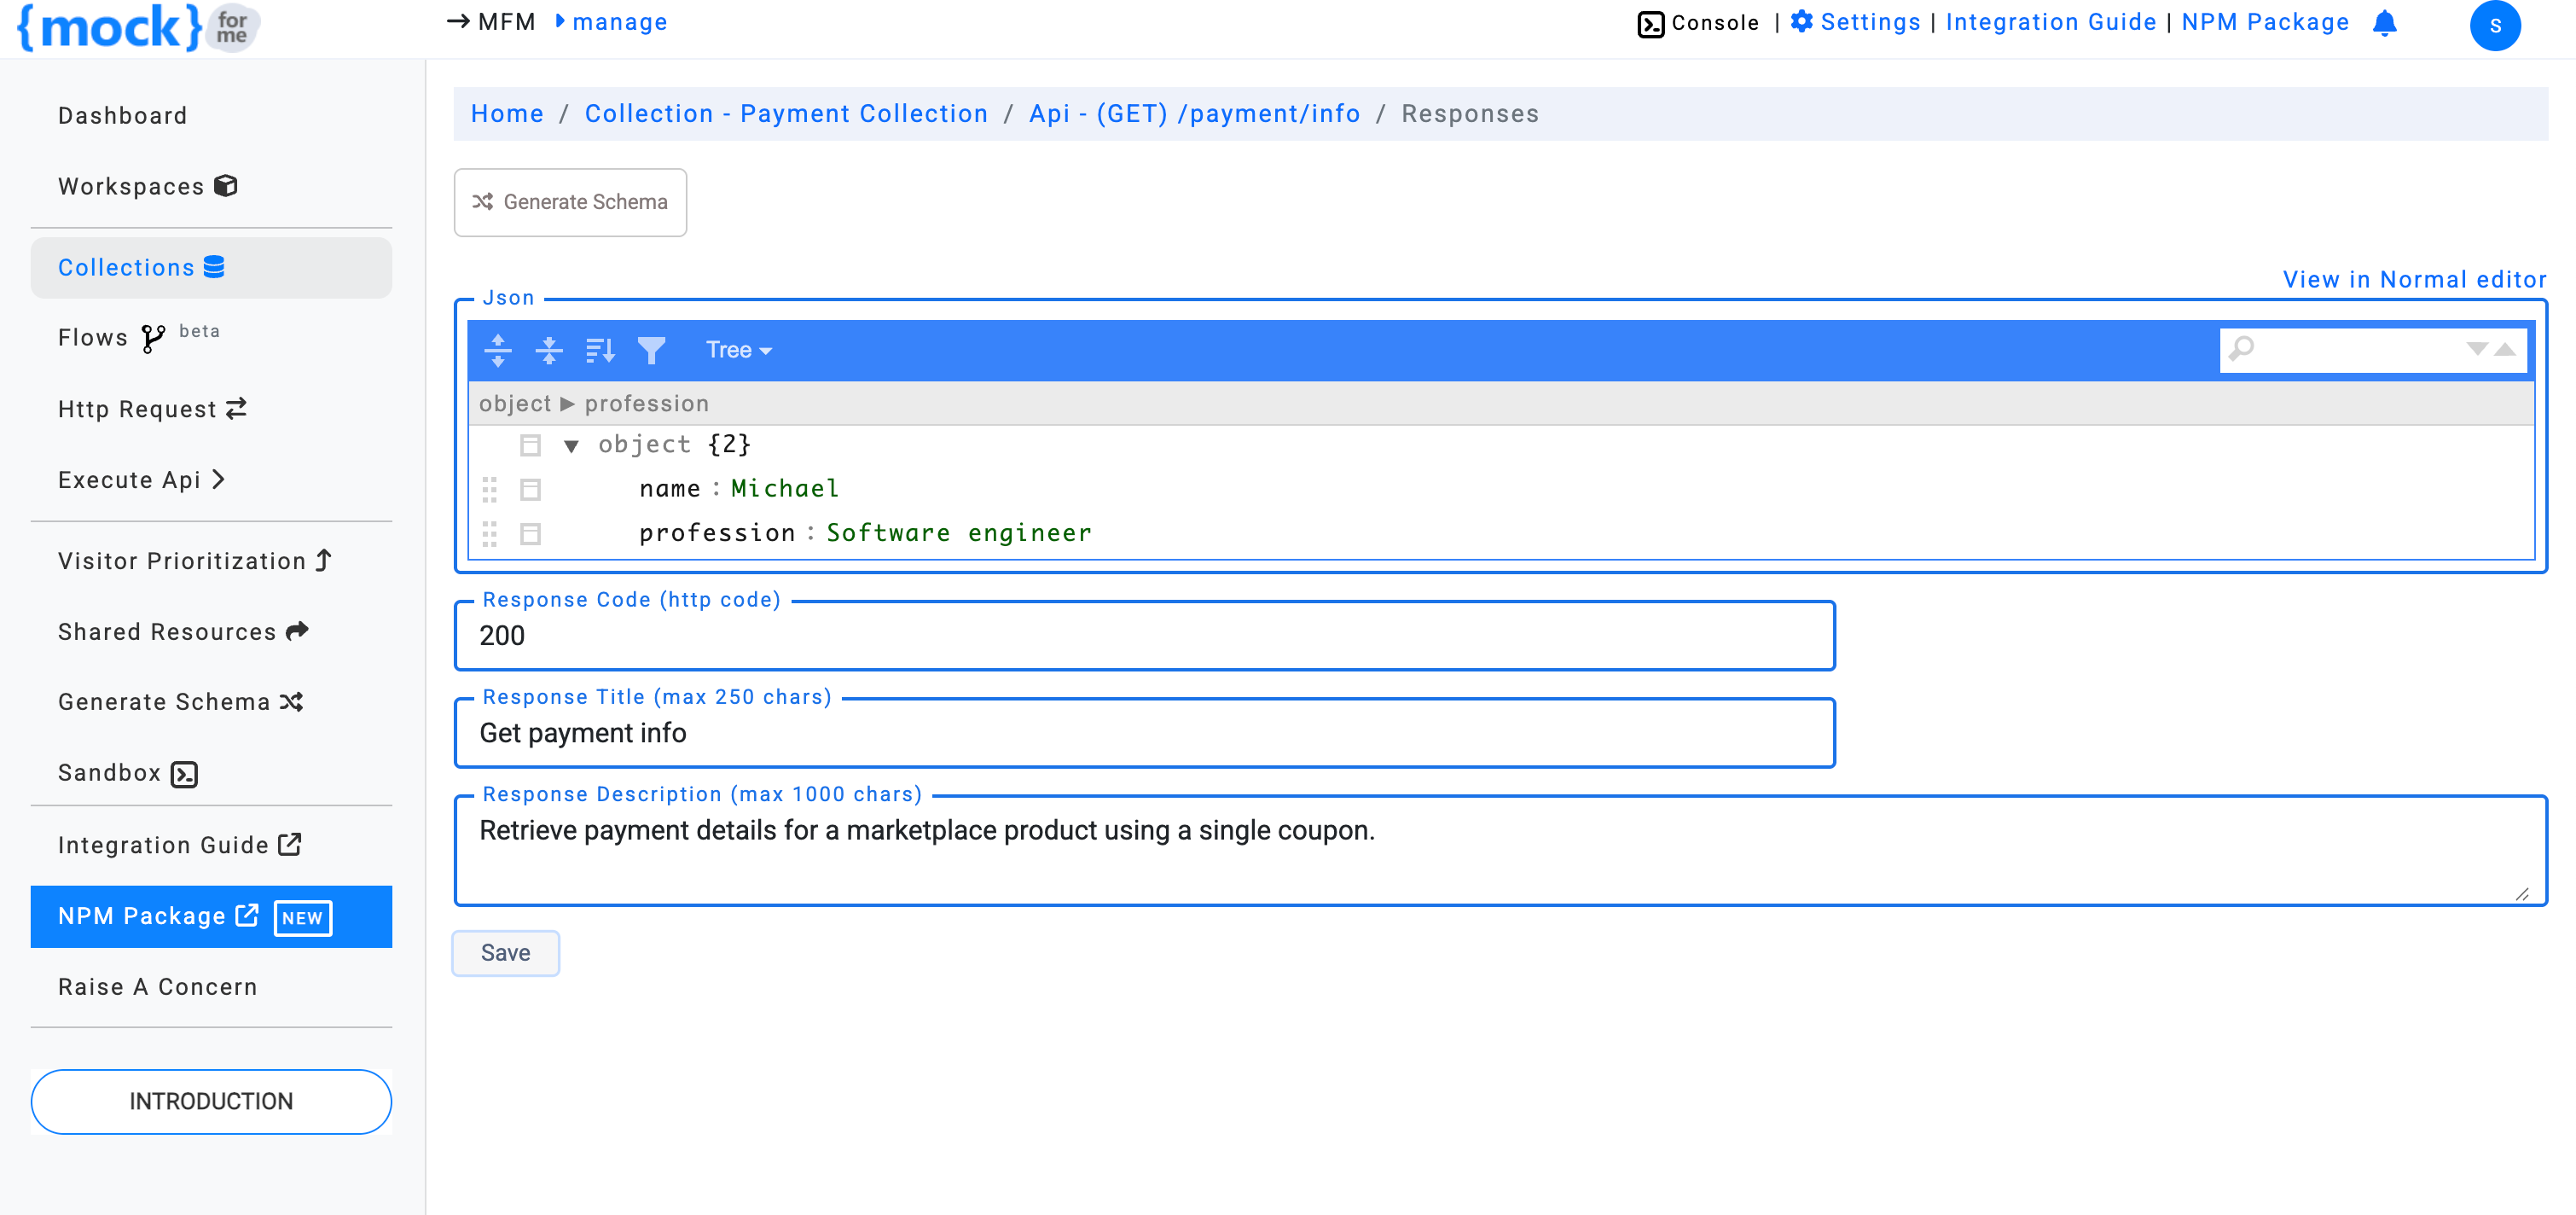
Once you're happy with your response, click Save to finalize the response. You will be redirected to the API Response Listing page.

By default, the status of a newly created response is set to Off. To activate the response, simply toggle the Status to ON.
Note: Only one response can be active at a time for each API endpoint.
Generate Mock Data Using Faker.js
mockforme allows you to generate mock response data using faker.js. This is especially useful when you need dynamic and realistic data for your API responses.
To generate mock data:
- Click the Generate Schema button on the Create New API Response page.
- A popup will appear where you can customize the data type (e.g.,
string,number,boolean,date).
Once you click on Generate Schema, you'll be presented with a schema preview:
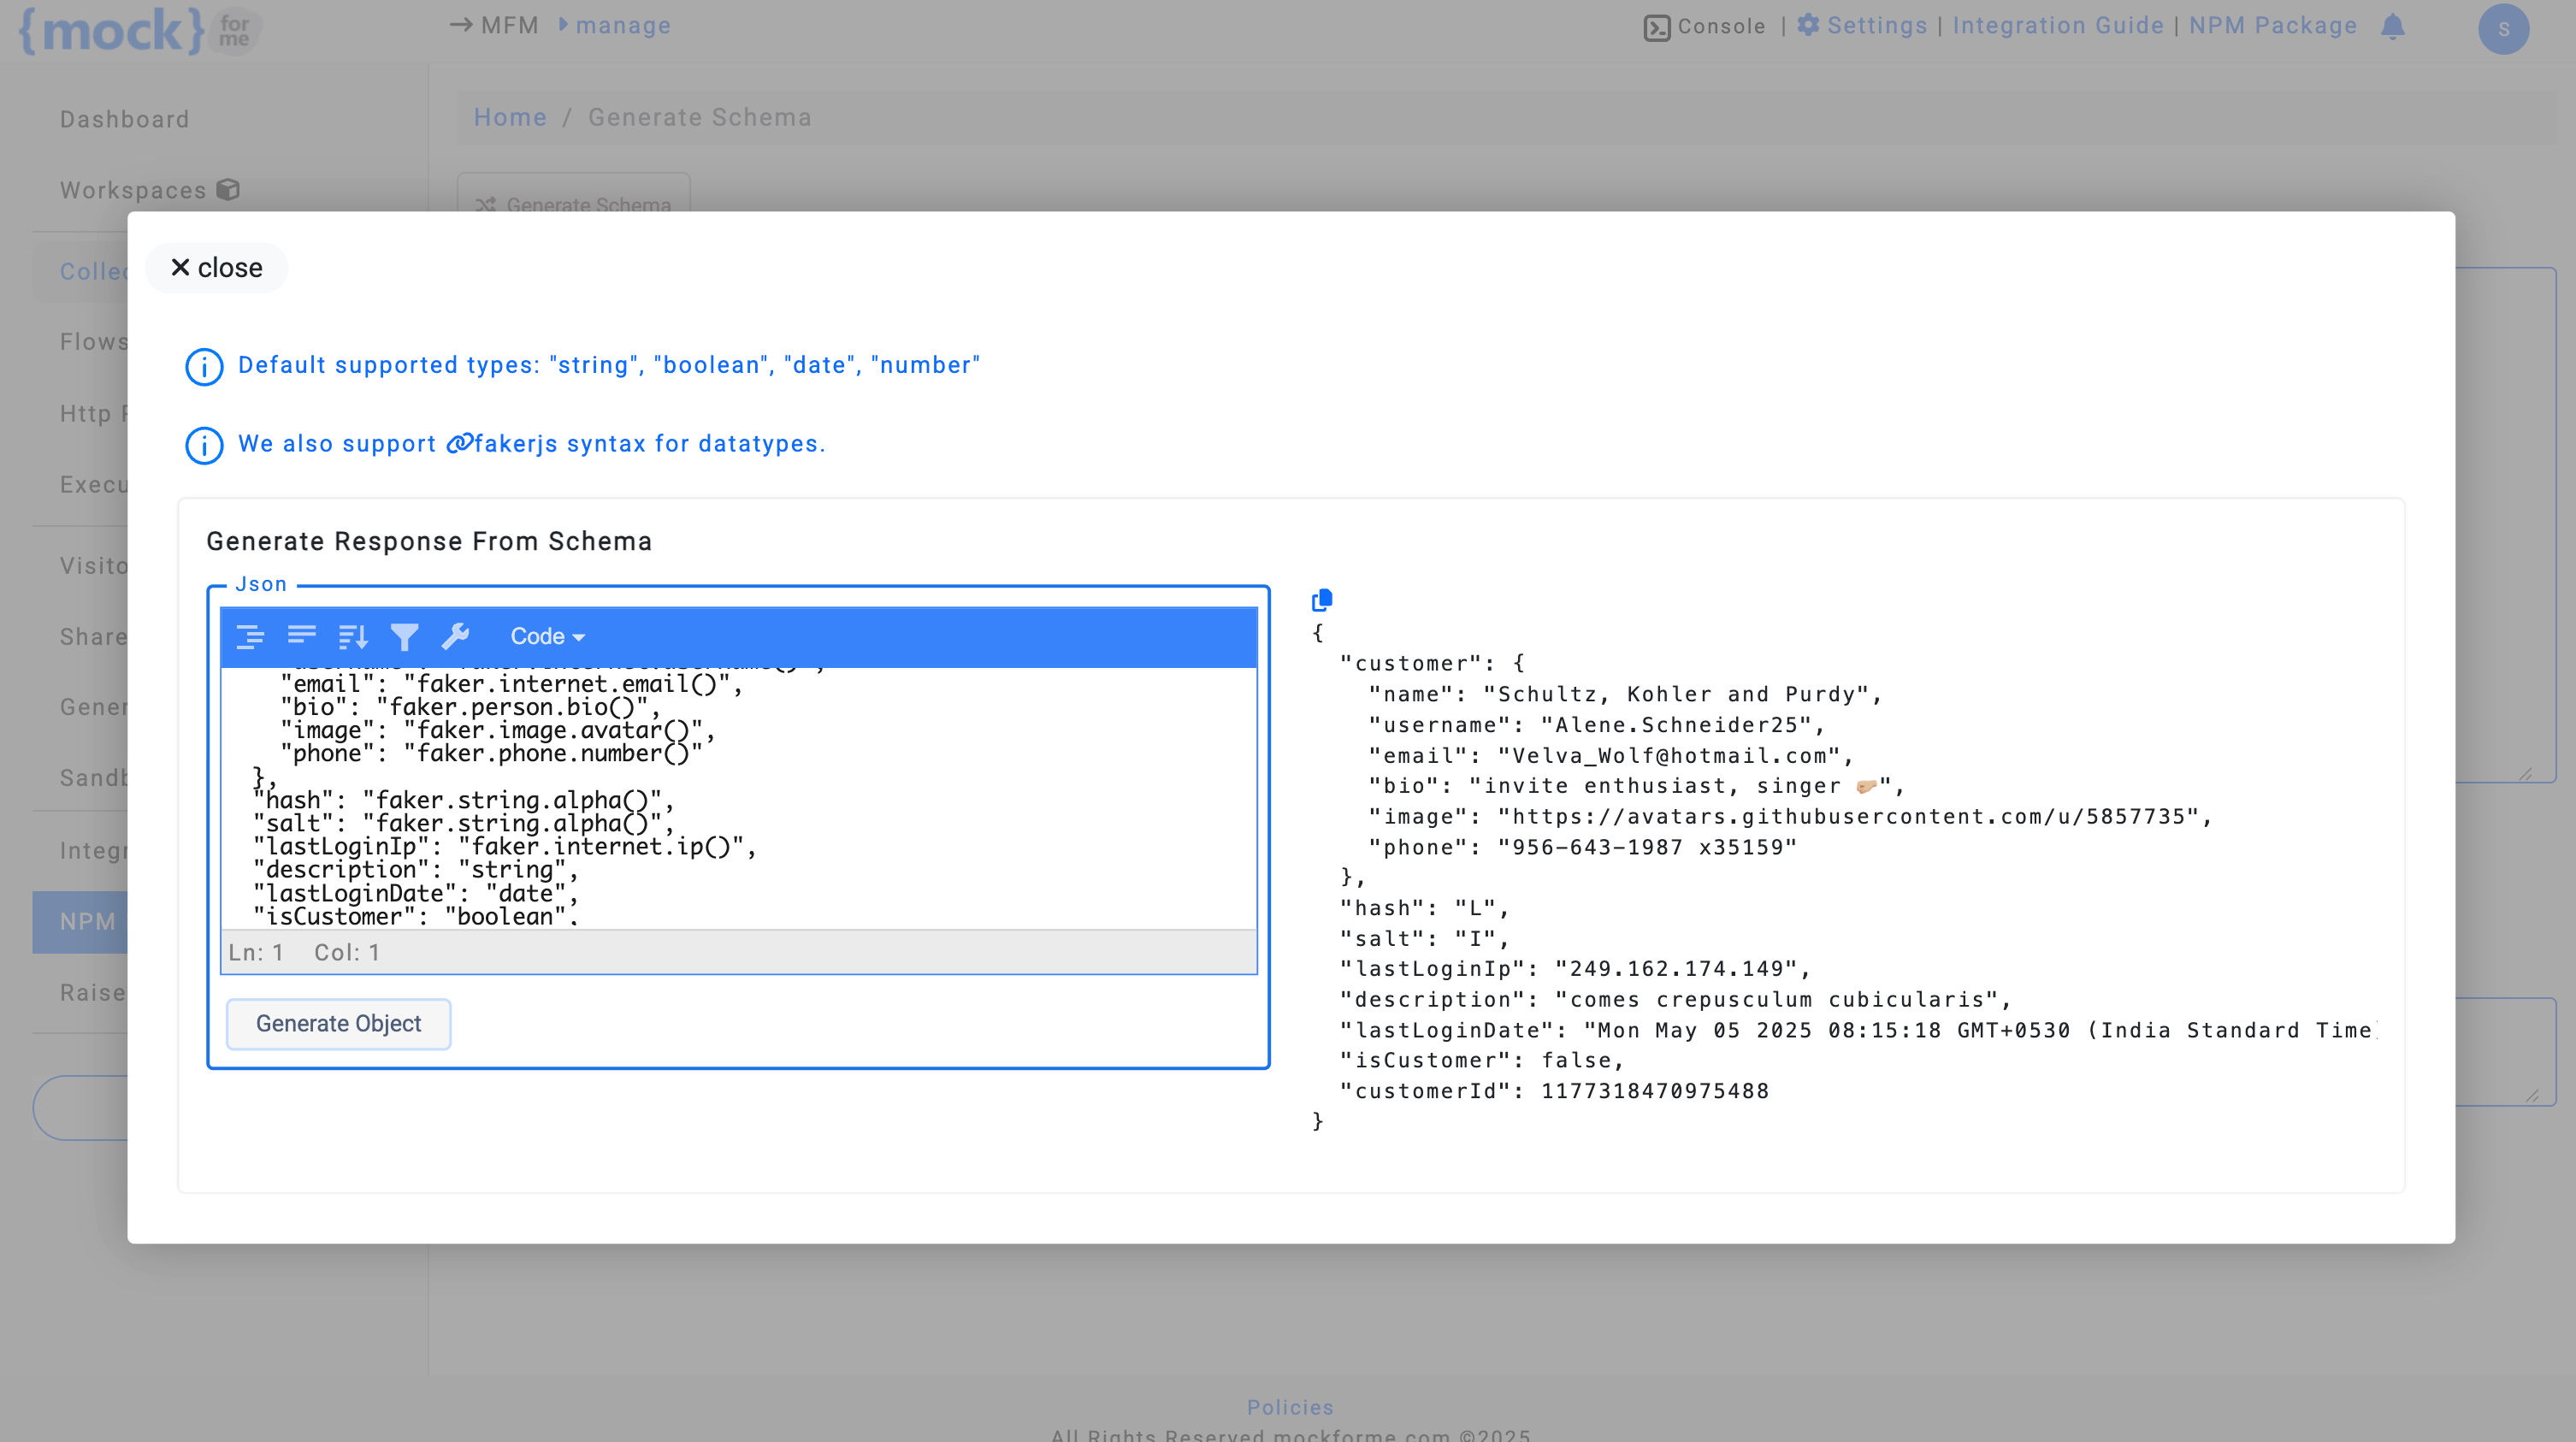
You can then copy the generated schema and use it directly in the API Response textarea.
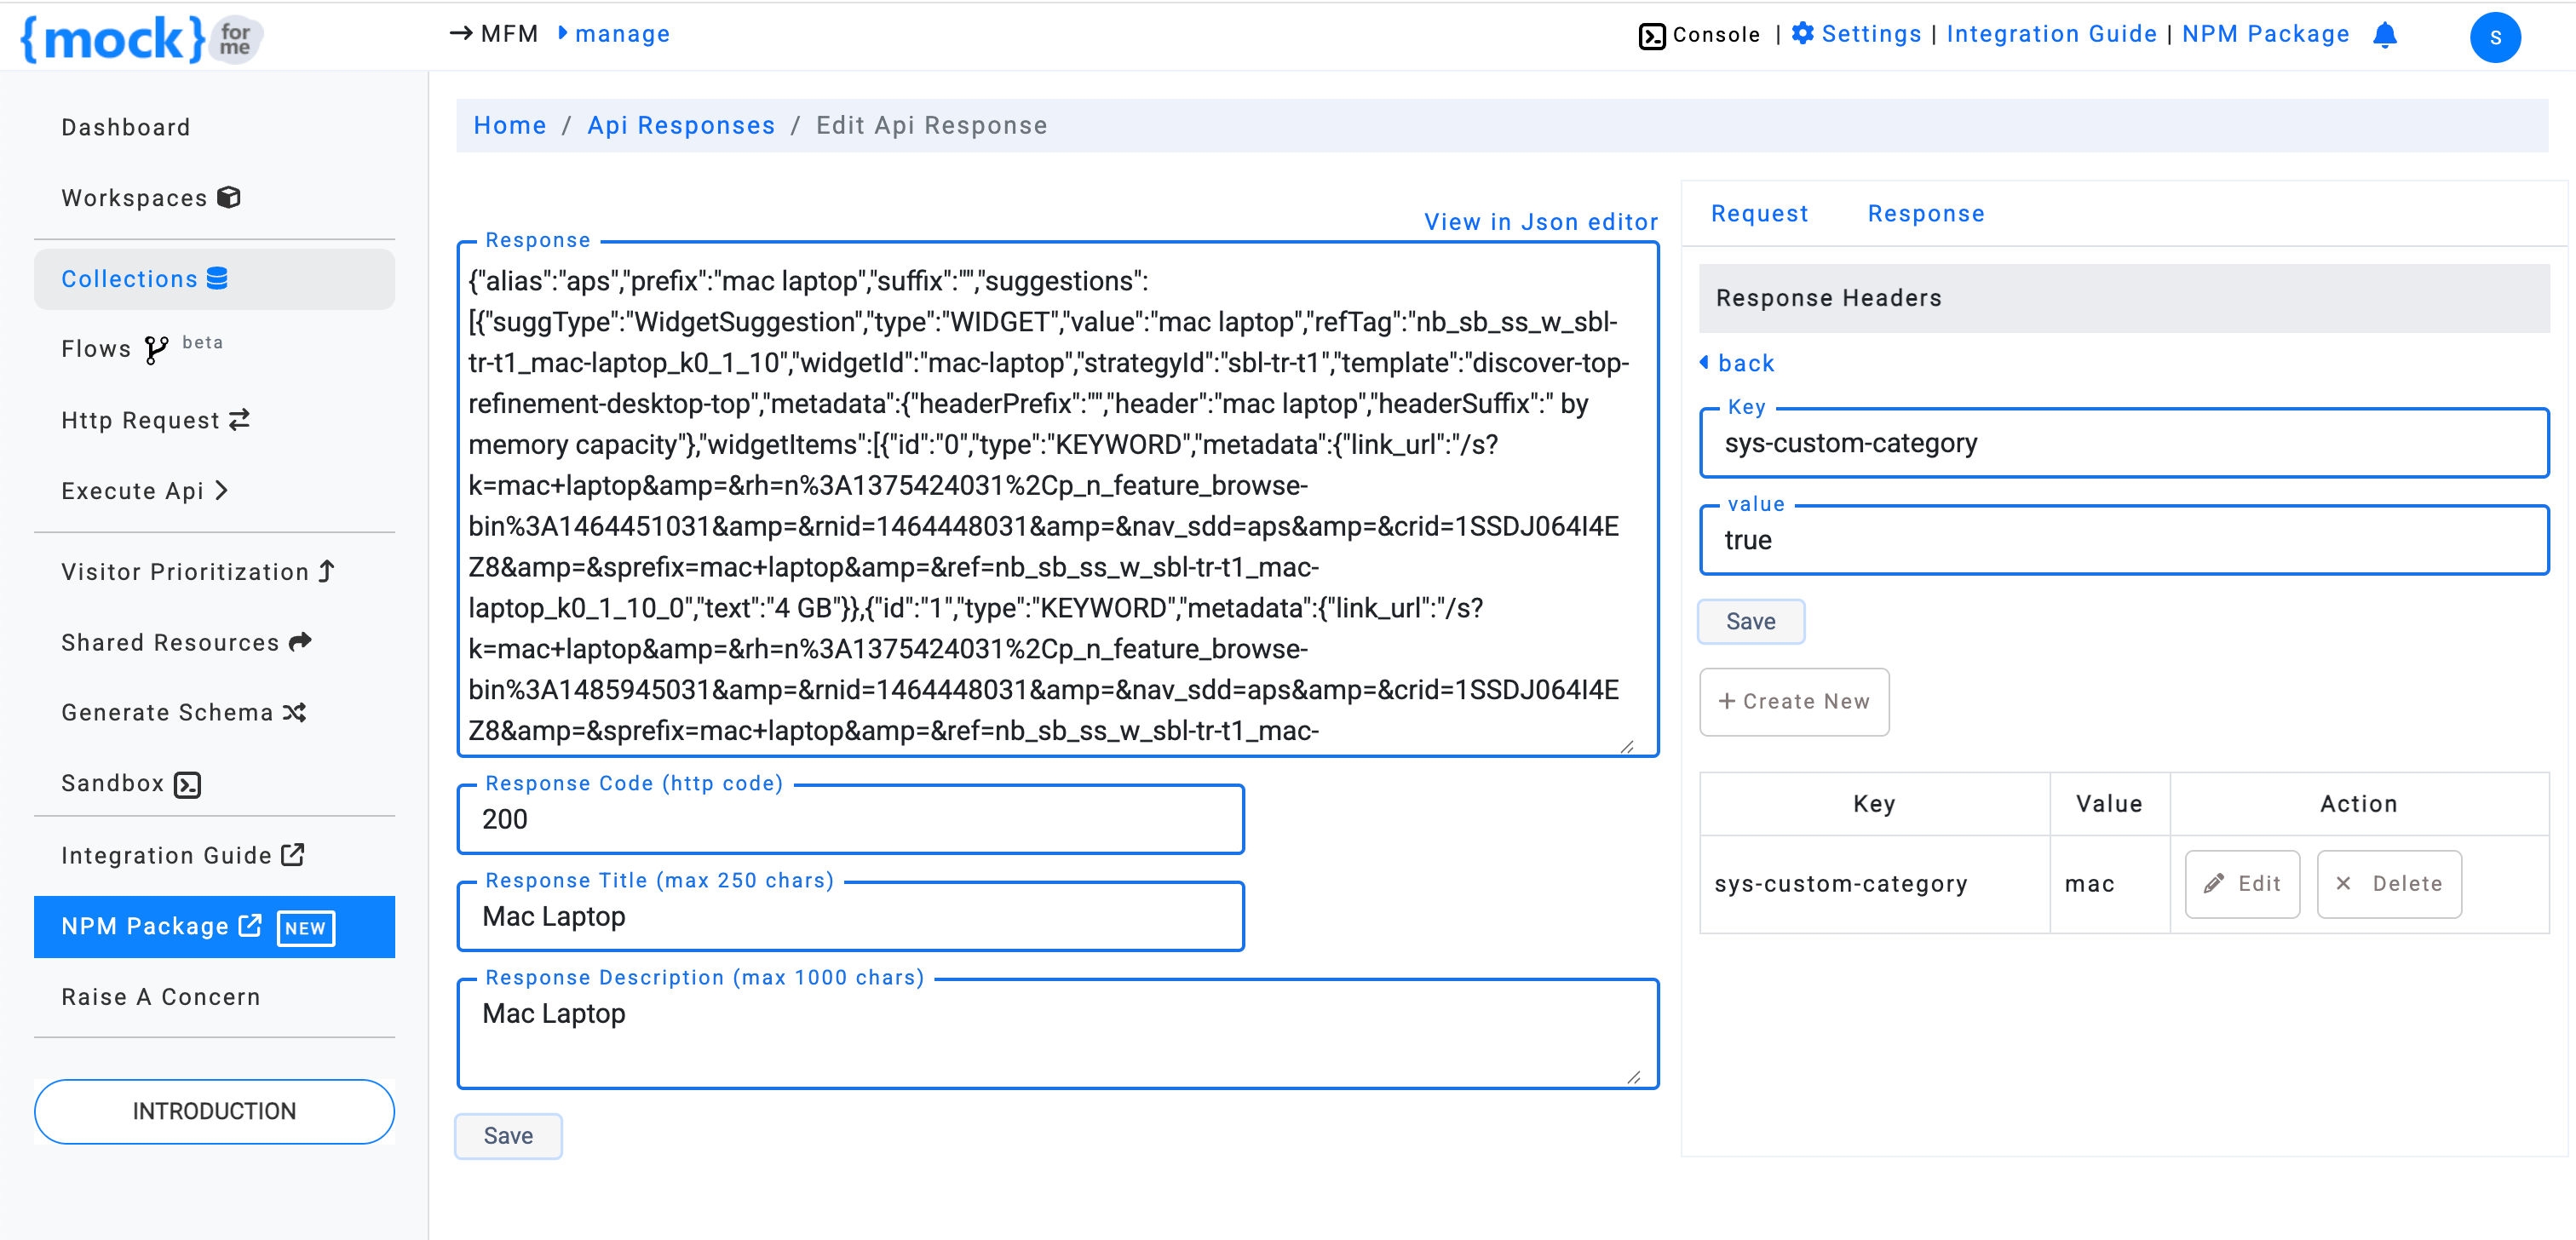
Customize API Response Headers
mockforme also allows you to customize response headers for your mock APIs. This feature is available when you edit an existing API response.
- Click the Edit button for the response you want to modify.
- In the Response Header section, add the key and value for each custom header.
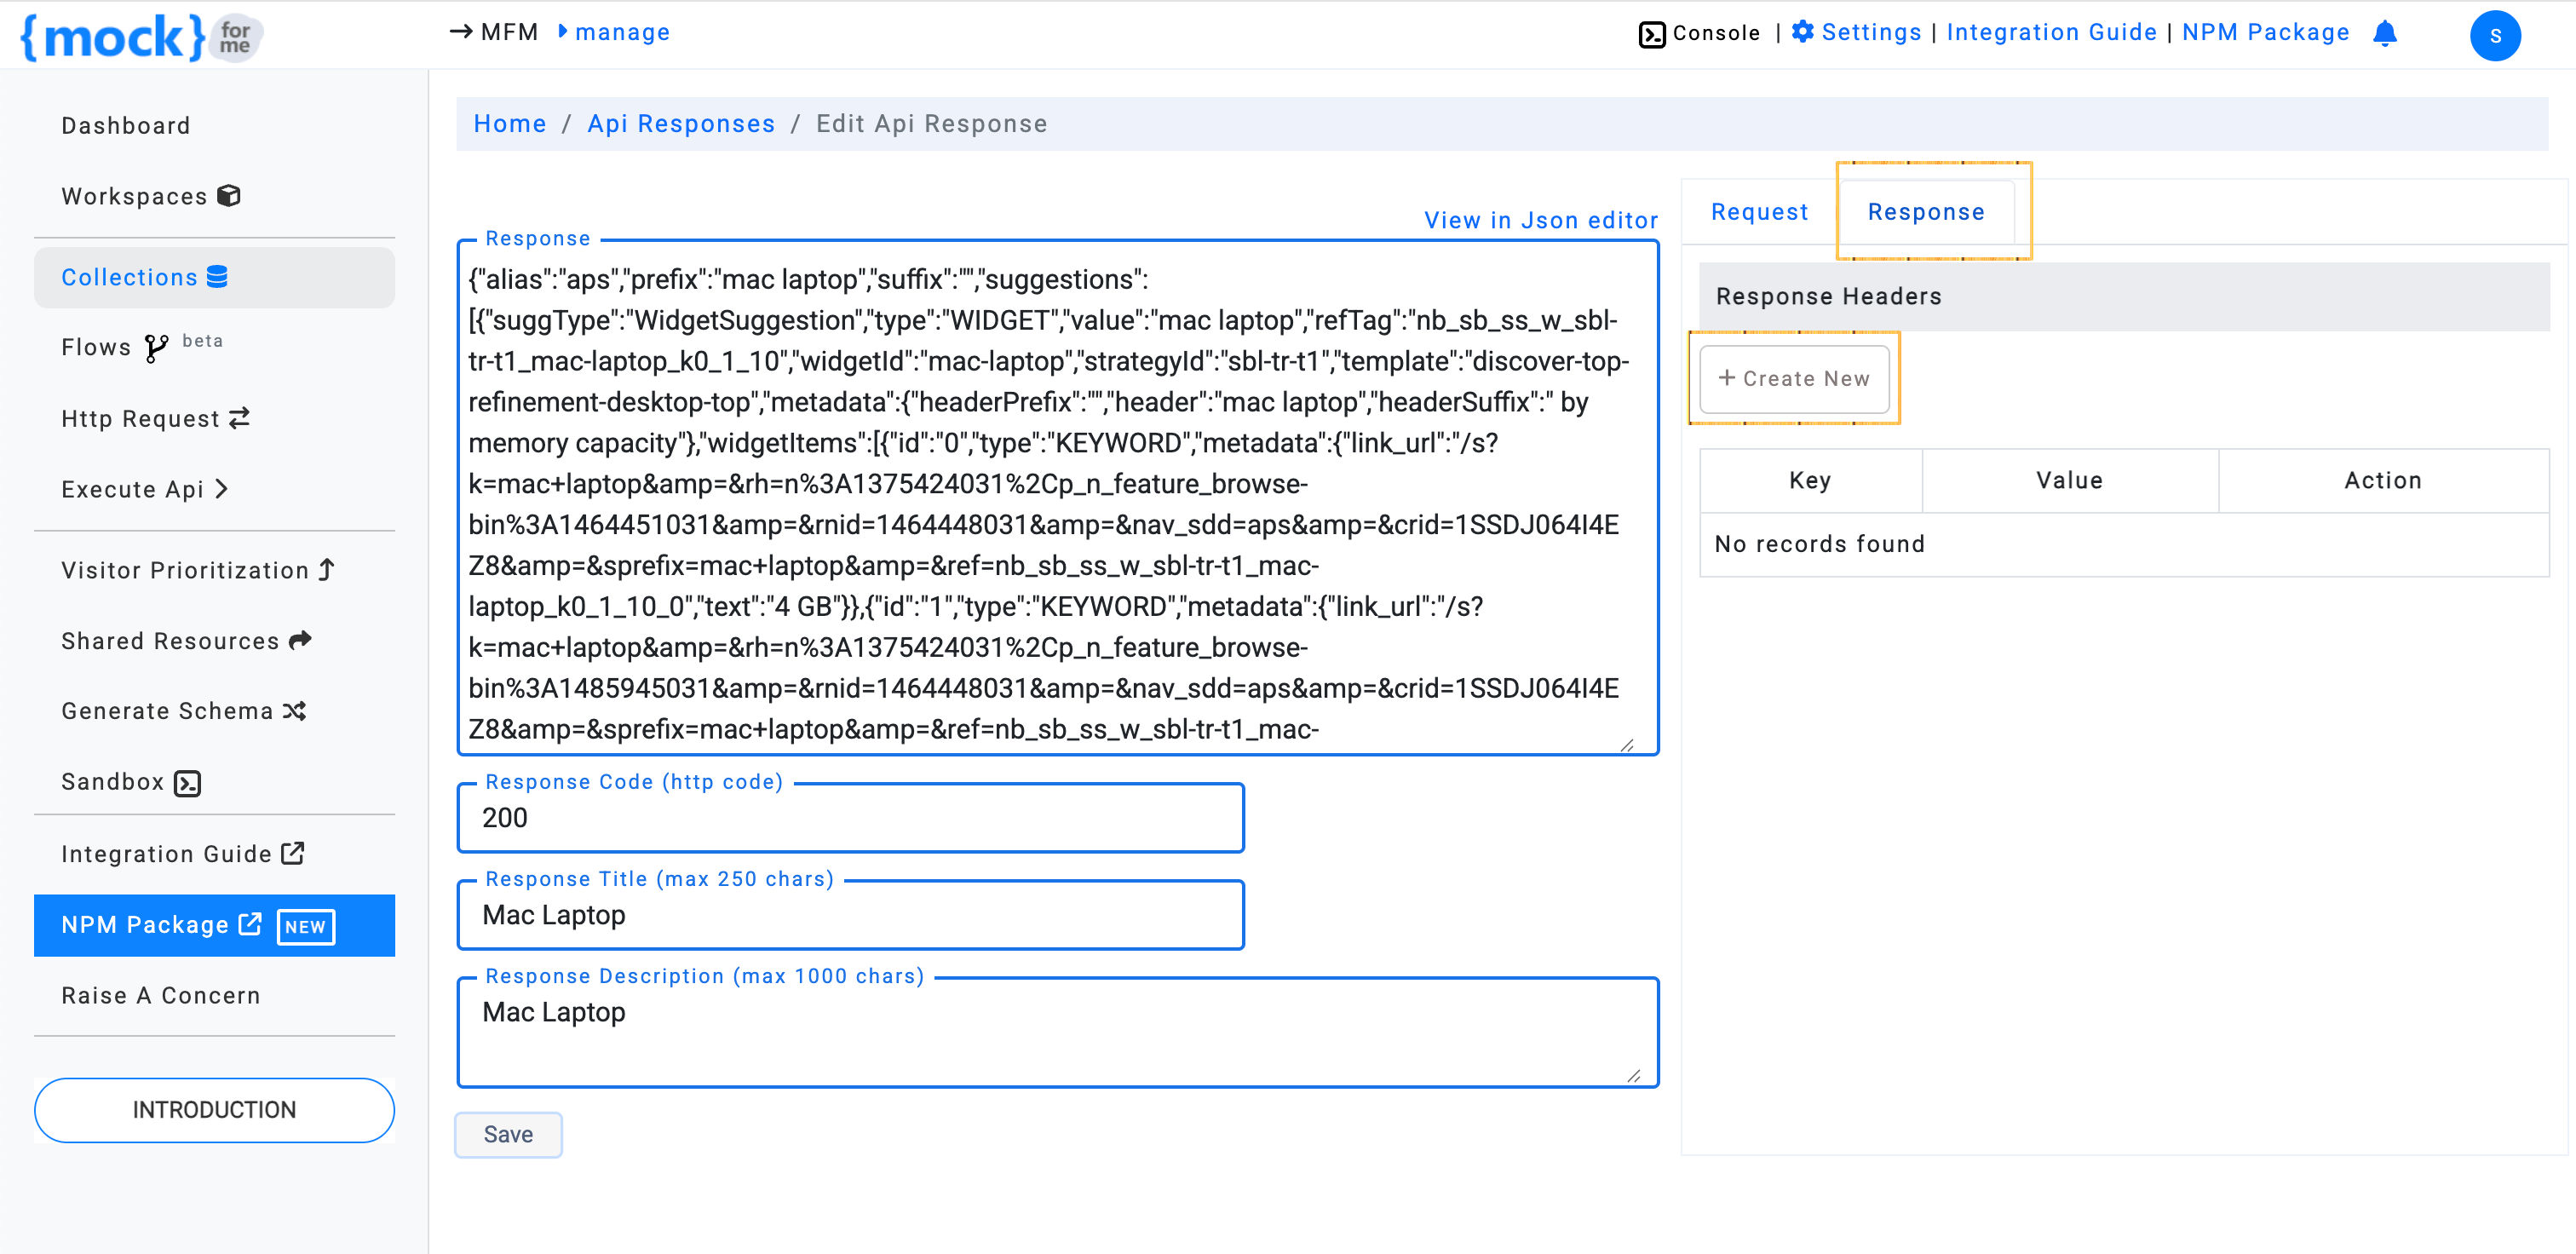
After entering the custom headers, click Save to finalize your changes.
Benefits of Creating Custom API Responses
- Simulate real-world scenarios with dynamic API responses based on different conditions
- Test different status codes (e.g., 200, 404, 500) and response data to improve your application's robustness
- Generate realistic mock data using Faker.js for more accurate testing
- Customize response headers for advanced testing of header-based functionality